Using Volumio
This page provides an overview of the Volumio web interface and how to play music. See the other pages in this section for information on specific network streaming services (Roon, Qobuz, TIDAL and Spotify).
Before proceeding, use the front panel encoder or the remote control to select the LAN input source:

A quick tour
The default Volumio interface with key items highlighted is shown in this screenshot:
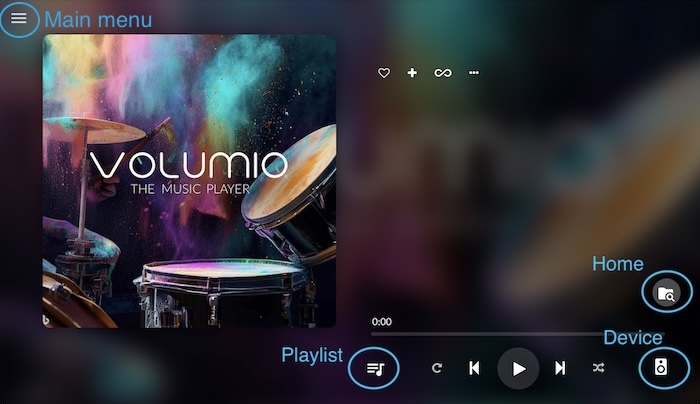
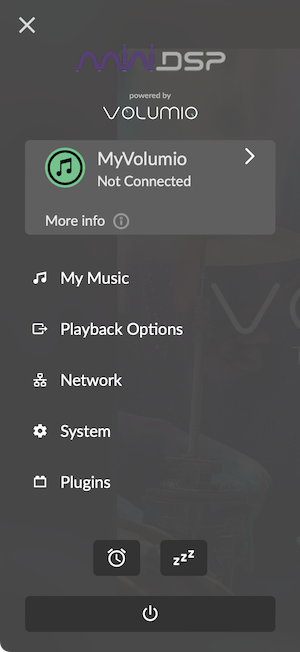
The hamburger menu at the top left brings up the main menu in a sidebar. The items in this menu will be mentioned on this and related pages. For now, note that if the Volumio processor needs to be restarted, this can be done with the button at the bottom of the menu:
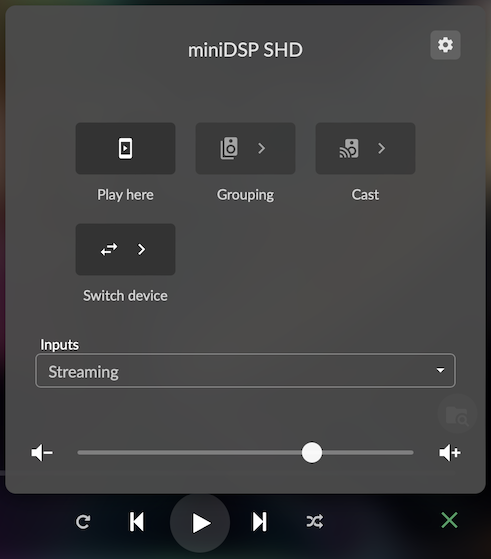
The "Device" button brings up an overlay that controls several network playback features:
The "Playlist" button displays the current playlist. The button marked "Home" leads to the main music navigation screen:
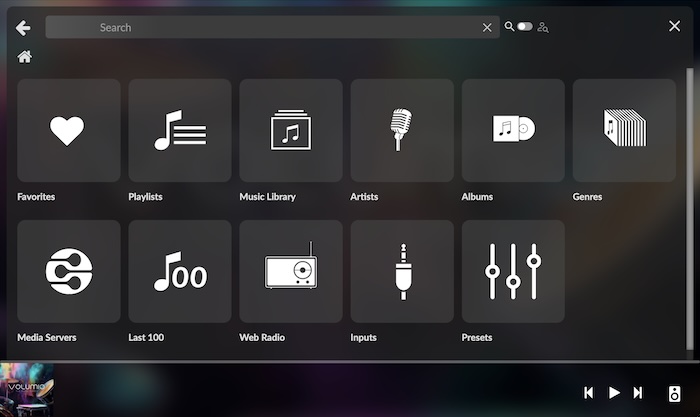
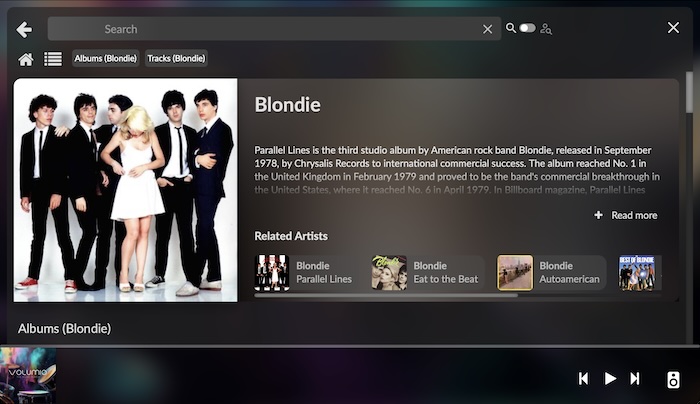
From here you can browse music in your library. (Below we will list different ways to add music to the library.) For example, you can view a particular artist:
Playing audio from USB stick
A simple way to get started with music playback via Volumio is with music files loaded onto a USB stick. Insert the USB stick containing music files into the USB HOST port on the rear panel, next to the Ethernet port.

Info
It is not possible to play audio from a USB stick if using the Wi-Fi dongle, as there is only one USB host port.
Volumio will start indexing the USB stick. Navigate to the Home screen, where you will be able to browse the files by folder (click on Music Library, then USB, then on the name of the USB stick), by artist or by album.
Tip
If, after removing the USB stick, all albums are not removed from the Volumio Library, go to My Music from the Main menu and click Rescan.
Playing files over the network
The miniDSP SHD Studio supports many ways of playing files over the network. Some of the streaming services are described in more detail on following pages. For music files located on your own local network, there are several options:
-
Use a DLNA media server. These can be accessed from Home → Media Servers. This method allows a more powerful processor located on (for example) a NAS to do the "heavy lifting" of indexing your music library.
-
Mount a shared folder directly over the network to Volumio. This function is provided in My Music → Network Drives.
-
Stream directly to the SHD Studio from an app running on a mobile device or computer.
-
Use Roon. Roon is described more on the Roon page.
More notes and hints are collected in our audio streaming app notes library.
Using multiple processors
More than one SHD Series processor can be controlled from the same web interface screen. Furthermore, Volumio supports synchronized multi-room playback.
Setup for multiple processors
Each SHD Series processor on your network must have a unique name. Follow these steps:
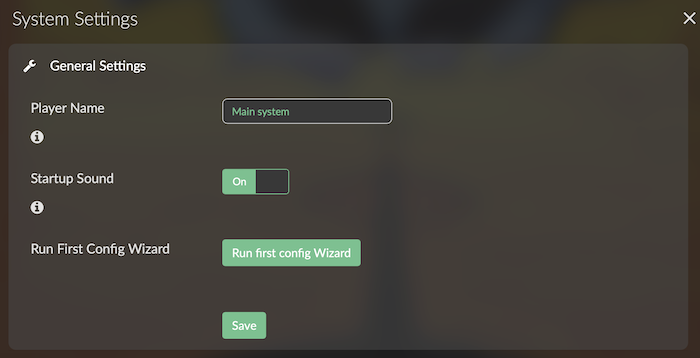
- On the first SHD Studio, navigate to System Settings and set Player Name to something unique, then click Save. In our example, we used "Main system":
-
Restart Volumio (use the button at the bottom of the main menu and select the Restart option).
-
To reconnect to the interface, use the new name. In our example, it will be http://main-system/ or http://main-system.local/.
-
Connect and turn on the second SHD Studio. Connect to it at http://minidsp-shd/ or http://minidsp-shd.local/ and change its name away from the default as above. In our example, we used "Study system" for the second SHD Studio. Select Shutdown and then Restart.
-
Re-open the web interface using one of the new names. If you used spaces in the name, replace the spaces with hyphens. For example, in our case we connected to http://main-system/.
Switching between processors
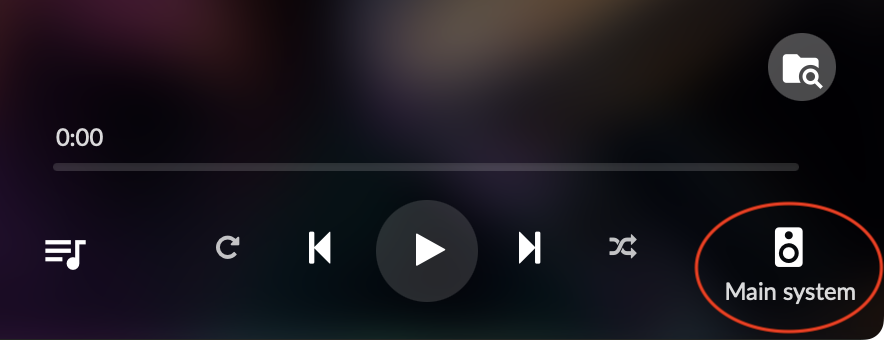
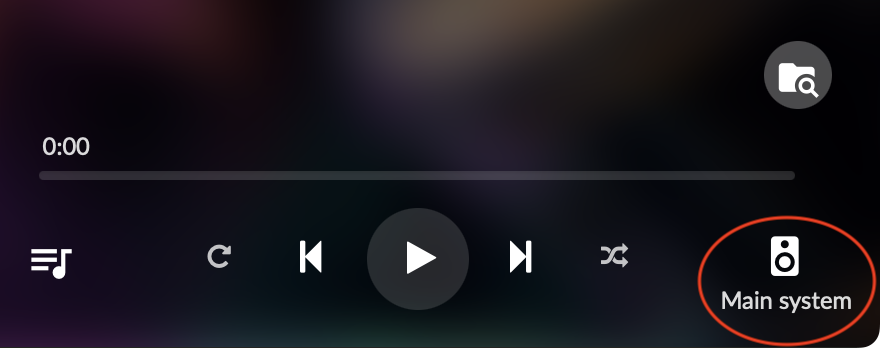
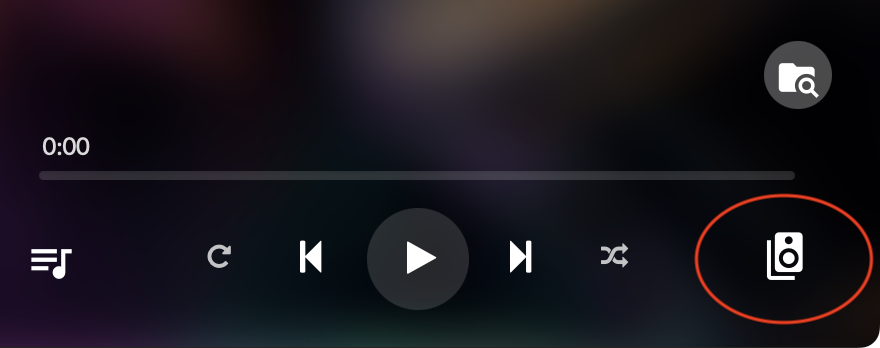
At the lower right of the screen, you will see the name of the processor that is currently being controlled:
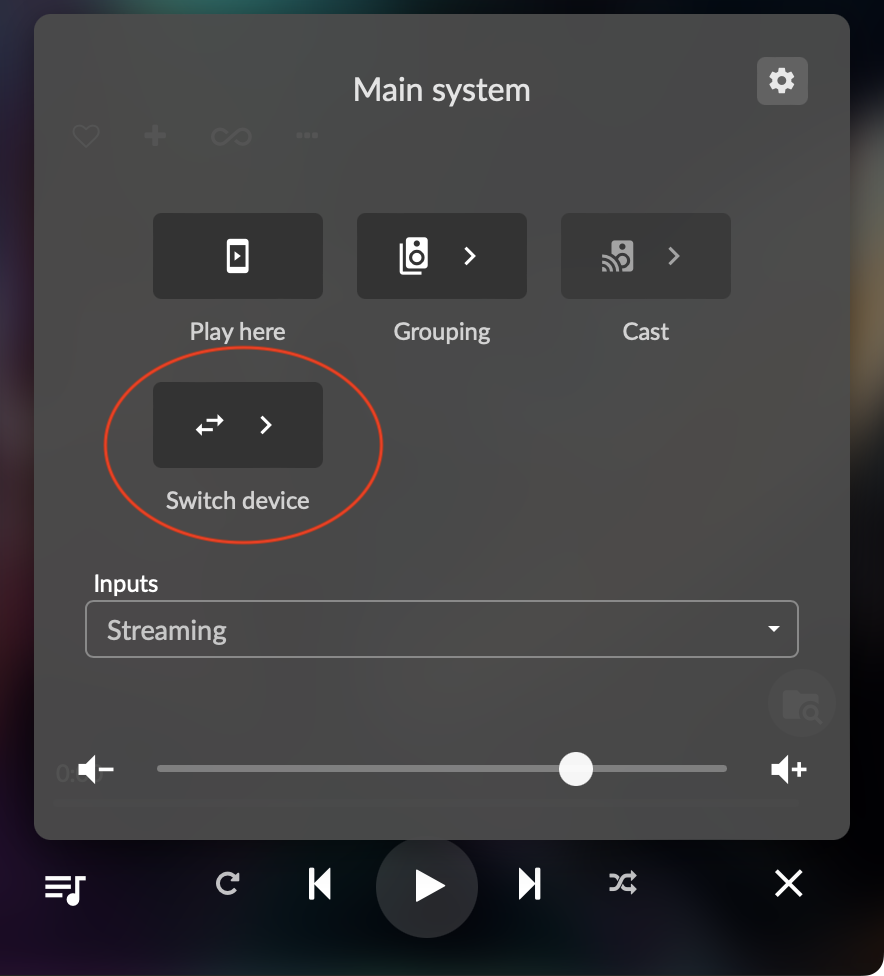
Click on the name to bring up the control panel, then click on "Switch device":
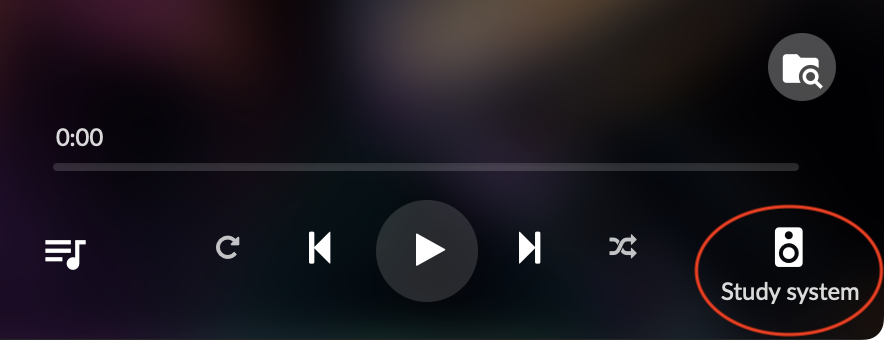
Click on the name of the device that you want to control:

Close the pane (click on the "x" at the bottom right). The name of the device that is now being controlled will appear at the lower right:
Multiroom synchronized playback
Volumio can play synchronized audio back through multiple devices, with some exceptions as shown in the table in the next section.
We will refer to the device that you use to control playback as the primary device, and the other devices as secondary devices. The primary device will be the one that you have used to connect your NAS, logged into your Qobuz or Tidal account, and so on.
To get started, first check you are controlling the primary device:
Confirm that multiroom playback is enabled in My Music → Functionalities Control:

Switch to the secondary device and confirm that multiroom playback is enabled on that device. Then switch back to the primary device.
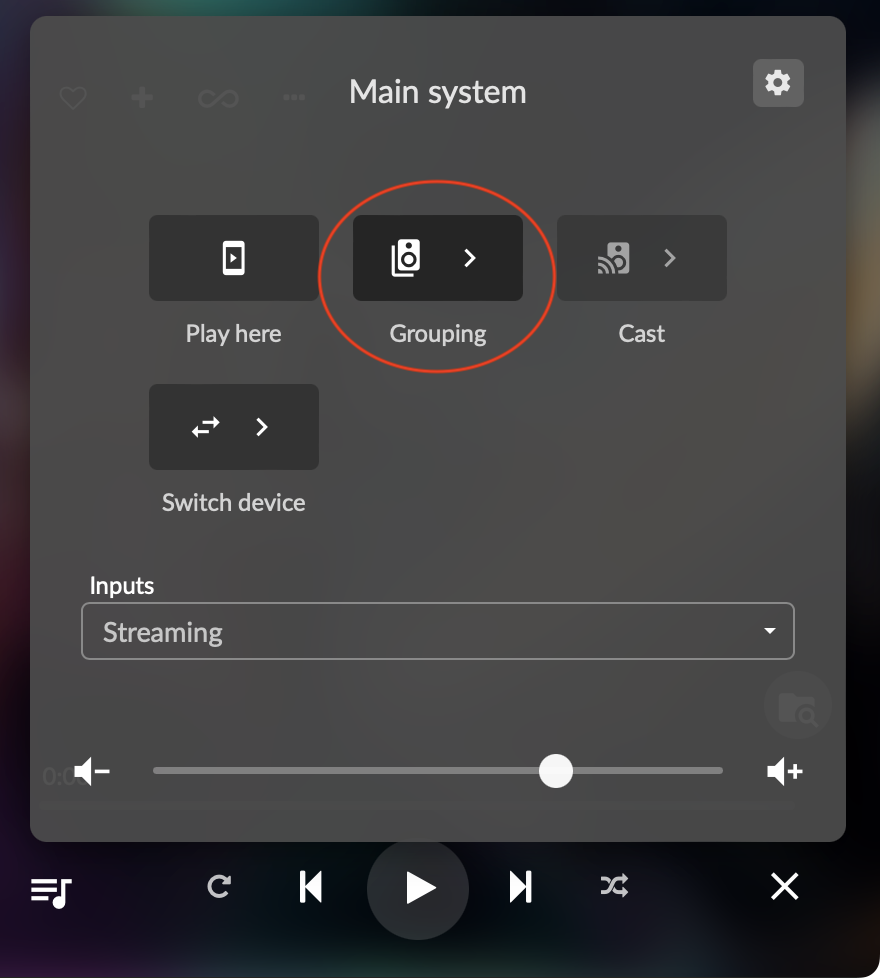
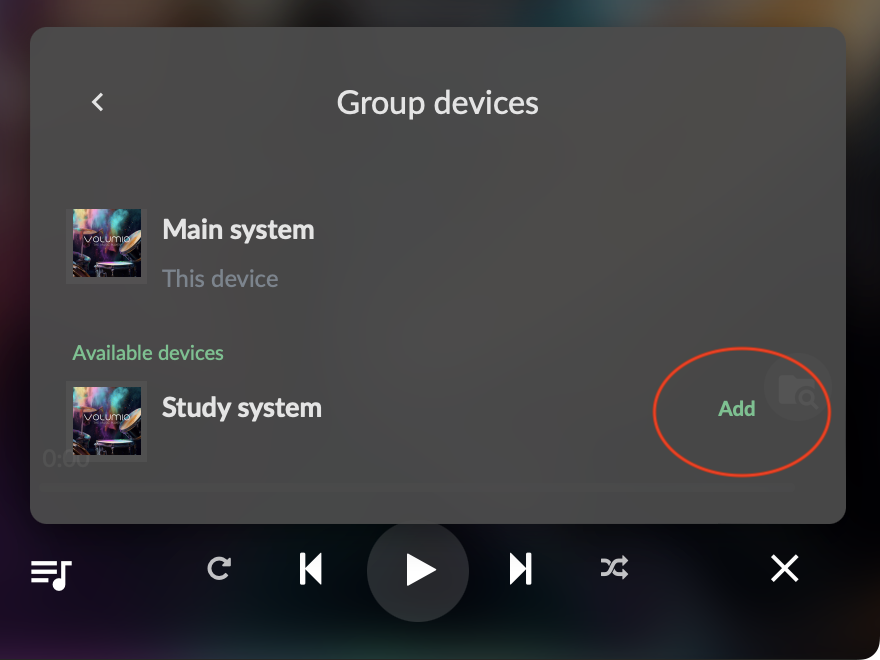
Click on the name of the primary device and select Grouping:
Add the secondary device (or devices) by clicking on the Add button:
The display will change to reflect the group:
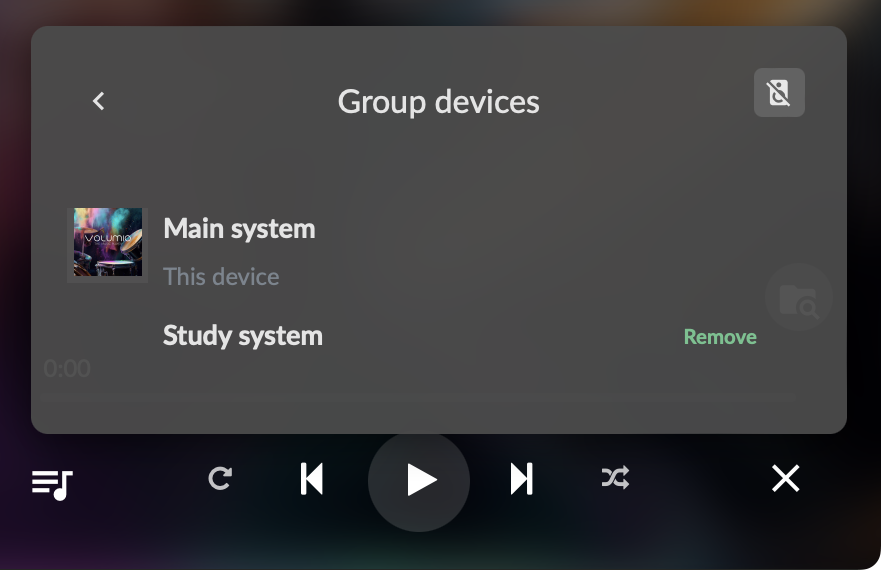
Close the pane and you will see the icon change to indicate multiple devices:
Now, any audio playback initiated on the primary device will also play on the secondary device.
Multiroom playback cheat sheet
Volumio can play synchronized audio back through multiple devices, with some exceptions as shown in this table:
| Item | Multi-room synchronized playback |
|---|---|
| File playback | Yes. For any playback of files initiated from within the Volumio web interface of the primary device. |
| Qobuz | Yes, when initiated from within the Volumio web interface of the primary device. |
| TIDAL | Yes. when initiated from within the Volumio web interface of the primary device. |
| TIDAL connect | Yes. In the TIDAL app, only the primary unit will appear. This may take a minute or two. |
| Spotify | Yes. The Spotify plugin must be installed on the primary device. Initiate playback in the Volumio web interface of the primary device. |
| Spotify connect | Yes. The Spotify plugin must be installed on the primary device. Select the primary device in the Spotify app. |
| Roon | No. Ungroup the devices in Volumio, and instead use the grouping feature in Roon. |
| Airplay | Yes. Select the primary device for output in System Settings → Sound. 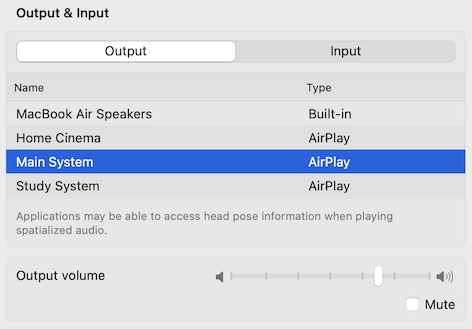 |
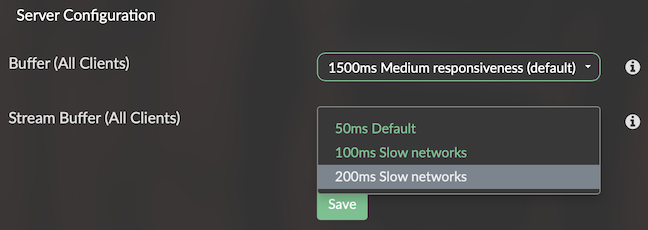
Multiroom playback settings
From My Music → Functionalities Control, scroll down to Multiroom Playback and click on the Settings button.
If you experience issues such as dropouts with multiroom playback, try increasing the buffer settings: