Configure Dirac Live for measurement
Select Recording Device
Use this tab to select the UMIK-1 and load its calibration file:
-
Click on the UMIK-1 microphone to select it. It will be labelled "Microphone (Umik-1 Gain: 18 dB)" or similar.
-
At the bottom of the grey rectangle, click on "No microphone calibration" and then "Load from file."
-
Locate your UMIK-1 calibration file in the file system and select it. The calibration file name and the calibration curve will then be displayed.
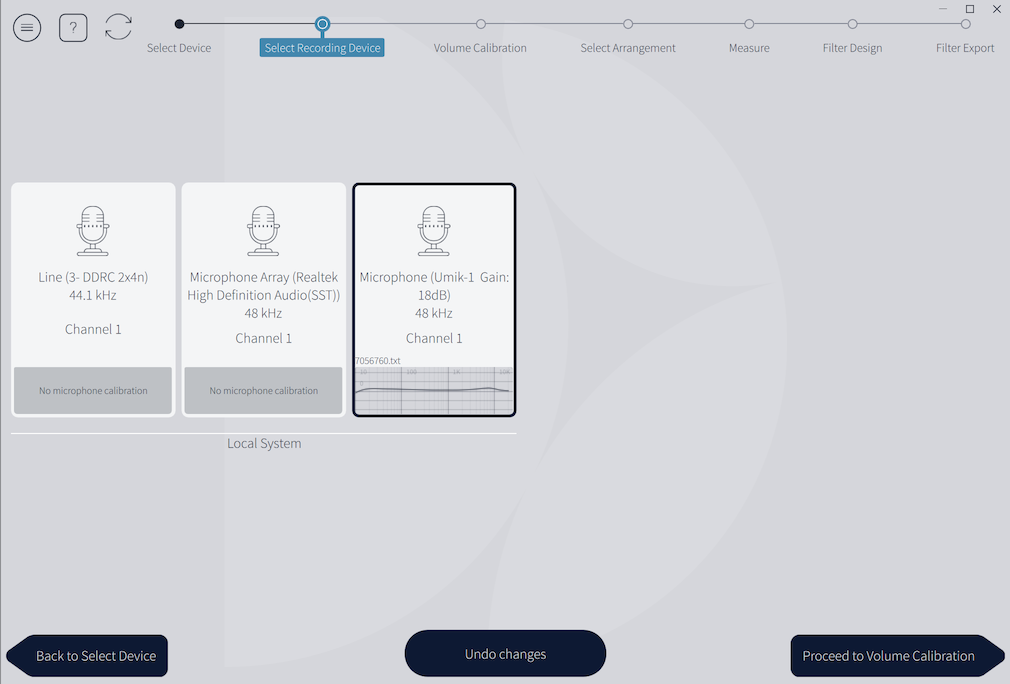
Once you have verified that this tab is correct, click the Proceed to Volume Calibration button.
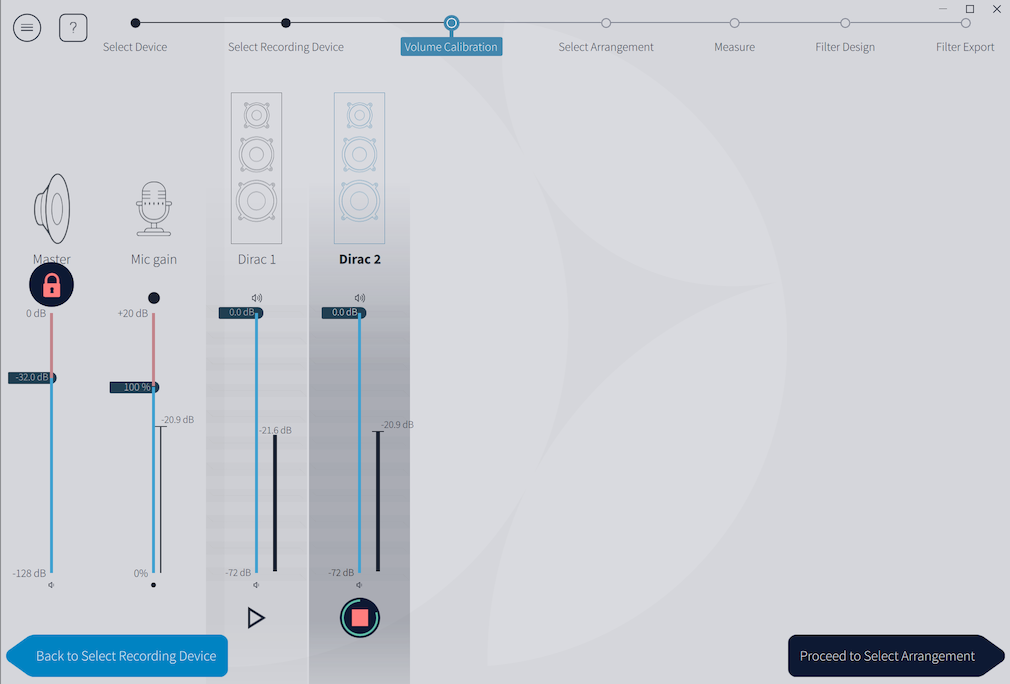
Volume Calibration
Use this tab to set the output level and microphone recording level. For best calibration results, ensure that the environment is reasonably quiet. Low frequency noise in particular can disrupt the calibration.
-
Check that the Master output slider is set low.
-
Click on the triangular button for the Dirac 1 channel and gradually increase the Master output slider. You should hear pink noise playing from the left front speaker. Continue to increase volume until it is at a moderate level, such that your voice would have to be raised to converse with someone sitting next to you.
-
Increase the Mic gain slider. Setting it so that the level meter reads between -20 and -30 dB will generally give good results.
-
Click on the triangular button for the Dirac 2 channel and confirm that the level is around the same as the first channel.
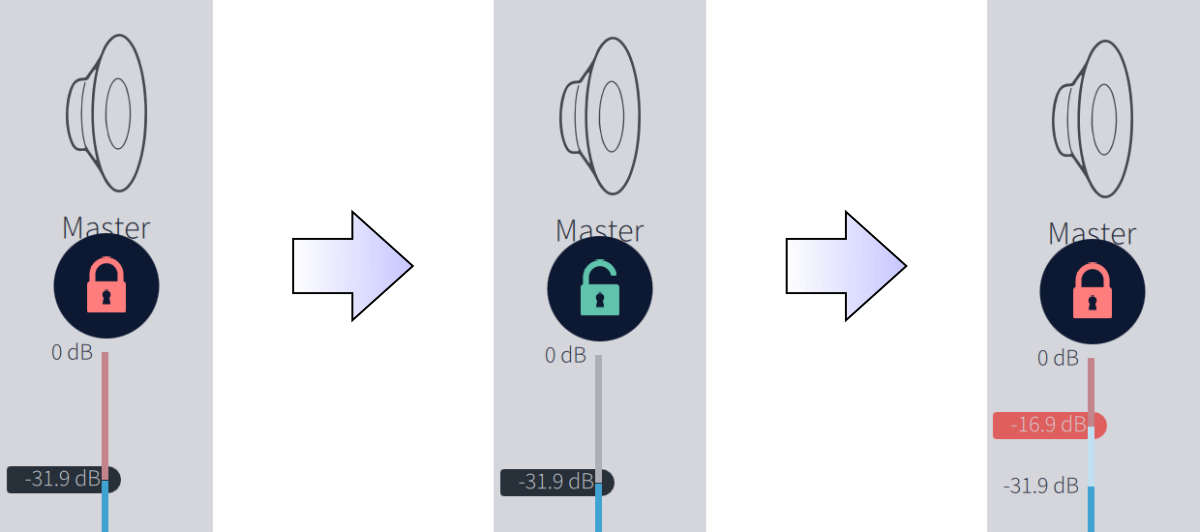
As a safety feature, output volume is limited to -32.0 dB. If you try to raise it higher, a lock icon will appear. To raise it higher, click the lock. It will "unlock" and then you can raise the slider further. The lock icon will automatically lock again after a few seconds.
Once you have set the input and output levels, click the Proceed to Select Arrangement button.
Info
Note: there will be only two channels shown, even if you have used the Device Console to set up routing for a subwoofer. This is because the miniDSP SHD Power is a stereo Dirac Live processor. Therefore, it treats each speaker combined with the subwoofer as a single channel. There is no separate Dirac Live channel for the subwoofer.
Tip
While the measurement technique used by Dirac Live is quite robust, low-frequency noise (traffic, HVAC, machinery, aircraft, storms) in particular can adversely affect measurement accuracy. A high level of ambient noise can degrade signal to noise ratio and prevent the algorithm from analyzing the test signal properly. Minimize the effect of any external noise, ensure that measurement signal levels are adequate, and/or choose a suitable time for performing measurements.
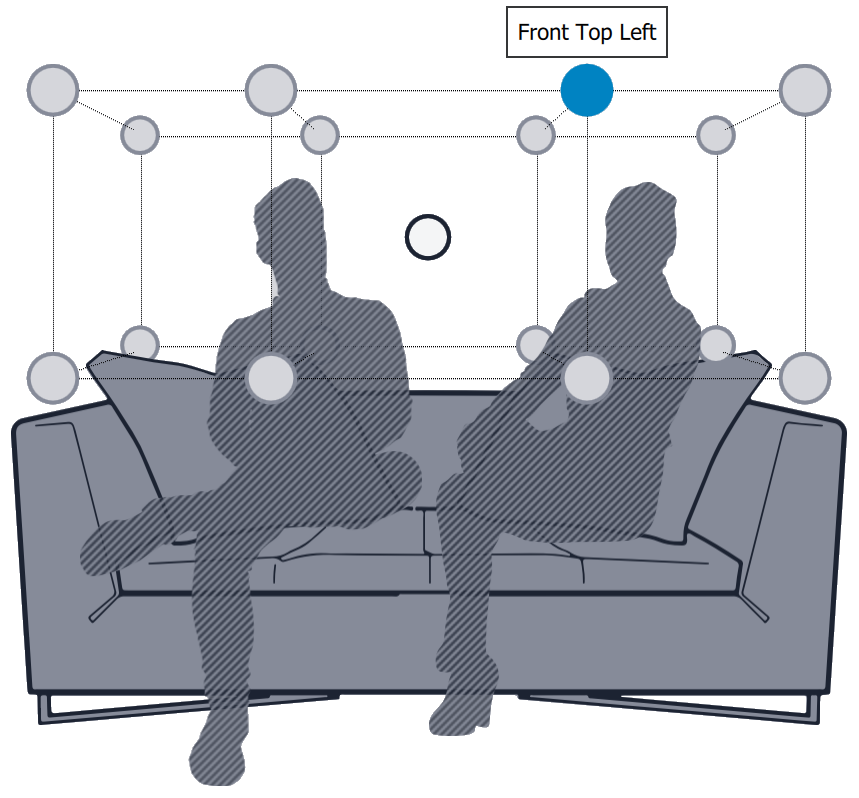
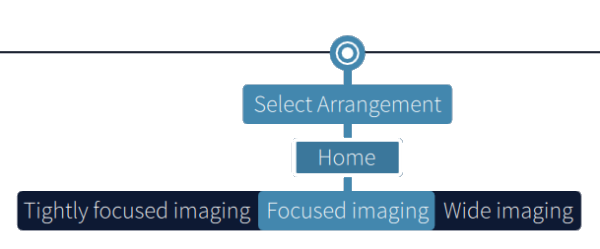
Select Arrangement
The Select Arrangement tab selects the type of seating arrangement to calibrate for. Each arrangement has a different number of measurement positions.
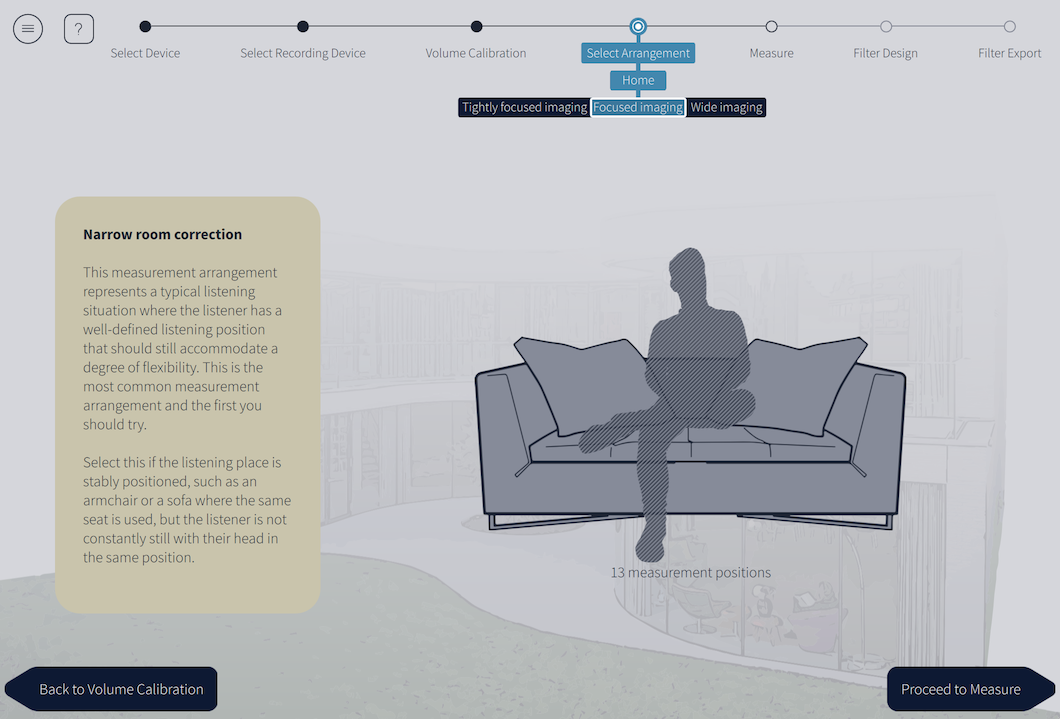
The menu bar shows the selection choices:
Use the menu to select the arrangement that is most appropriate for your listening area. They are described more below.
There are no hard and fast rules on which arrangement to use, so feel free to experiment by calibrating for more than one arrangement and auditioning the results. Up to four different sets of correction filters can be loaded into the miniDSP SHD Power.
After selecting the seating arrangement, click on the Proceed to Measure button.
Tightly focused imaging
This arrangement is best for a single listener. There are nine measurement positions:
Focused imaging
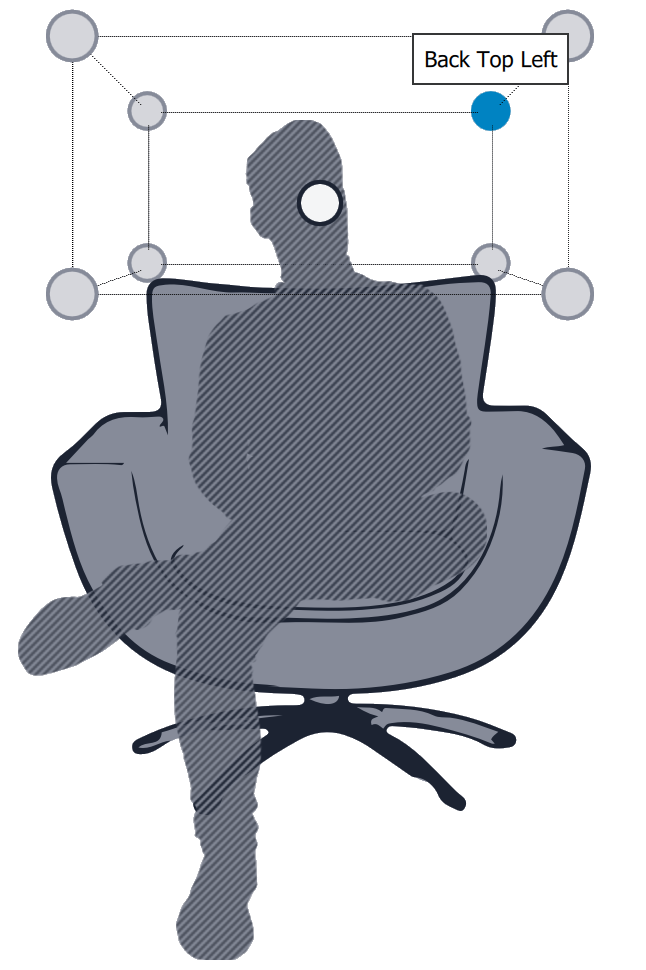
This arrangement is optimized for a single listener but also caters for additional listeners. There are thirteen measurement positions: the same nine as the tightly-focused arrangement, plus an additional four positions extending out to the left and right:

Wide imaging
This arrangement is optimized for multiple listeners. There are seventeen measurement positions: the same nine as the tightly-focused arrangement, plus an additional eight positions that extend the listening area out to the left and right: