The miniDSP Device Console
The miniDSP Device Console ("DC") is the new configuration and control software for miniDSP audio processors. It replaces the earlier "plugin" control software. In contrast to the earlier software, Device Console provides:
- A single software program to control all miniDSP processors
- Over-the-air (OTA) self-updates
- Detection and installation of firmware upgrades for your processor
- Purchase and activation of Dirac Live upgrades (where applicable)
If you have not used Device Console with your 2x4 HD before, you will need to perform a one-time migration procedure. See Migrating to DC.
Finding connected devices
The Discover Devices screen displays devices connected to your computer, or which have a network-accessible control interface.

Finding network-connected devices
The miniDSP 2x4 HD can be controlled by miniDSP Device Console over the network by using a miniDSP Wi-DG network to USB bridge.
If you have a Wi-DG on your network and connected to a 2x4 HD, it should appear in the list of connected devices. If not, confirm that you have updated the firmware on your Wi-DG to the latest version.
You can also connect to a device by manually entering the IP address of the Wi-DG (IPv4 only). To do so, click on the blue "+" button at the lower right of the window, enter the address and click Connect:

Connecting to a device
To connect to a device for editing and control, click on its name. DC will update to display the device-specific sidebar on the left and the signal processing control interface in the main area on the right.
The signal processing area is divided into sections for the input channels and output channels. There is a control strip for each channel. The output channel strips also contain the signal routing matrix.

If this is the first time you have used Device Console with your miniDSP 2x4 HD, Device Console will check for an existing preset that was created with the older MiniDSP-2x4-HD "plugin" user interface. If found, Device Console will automatically import it. This is done on a preset-by-preset basis.
When you are done, click DISCONNECT.
Tip
Once you have switched to miniDSP Device Console, don't use the older MiniDSP-2x4-HD "plugin" user interface to connect to the miniDSP 2x4 HD any more.
Using template devices
The Template Devices screen displays the complete list of devices supported by Device Console. This can be used to explore features of a processor that you do not have, or to edit your processor settings when you are not able to connect to it.

To edit a template device, click on it.
A template device "mirrors" the real device, so that you can edit your settings while not connected. That is, while you are editing the real device, the current preset is copied to the corresponding template device whenever you change presets and when you disconnect. You can then edit those settings in the template device.
Tip
While editing a template device, the level meters will display a "dummy" signal. To turn off the level meters while editing a template device, click the Mute button in the left sidebar.
Note that not all features will be visible when editing a template device, and not all visible features will function. For example, you cannot purchase a Dirac Live upgrade in a template device, as you must be connected to the actual physical device that the upgrade is for.
When you are done editing in the template device, click FINISH.
When you connect to your real device again, Device Console detects that you have edited the template and asks you if you want to use the settings from the edited template. Or, you can discard the changes you made in the template and revert to the settings that your device had the last time you were connected to it. This is done on a preset-by-preset basis:

Info
You will see a similar dialog if you edit the settings of your device using a different computer or the older "plugin" user interface (the latter is not recommended once you have migrated to the miniDSP Device Console).
Info
If you have more than one device of the same type, only one of them can be edited using the template device. If you have more than one device of the same type or need to edit your devices from more than one computer, you will need to manage your presets by exporting them to and importing them from files. See Importing and Exporting.
Settings
These settings are for Device Console itself (and not any connected processor).

The Modes selection sets the DC to display with a light theme, a dark theme, or with the same theme as your operating system (Windows or macOS). If you choose the System option, you may need to quit Device Console and restart it for the change to take effect.
The Install USB Audio Driver feature installs the latest version of the miniDSP UAC2 audio driver. It appears on Windows only. See Installation for more information.
The Create Program Snapshot feature is used to help miniDSP support diagnose issues you may be having with your unit. See Obtaining Support.
Device controls
The following sections apply when Device Console is connected to a processor, or when editing a template device.
Volume and mute
To change the volume from within Device Console, drag the slider:

To mute the 2x4 HD, press the mute button:

Tip
While the cursor is over the volume slider, use the mouse scroll wheel to adjust volume.
Input sources
To select the input source, drop down the selector menu and select the desired input:

Info
The input source can also be selected with a remote control.
Using presets

The miniDSP 2x4 HD has four onboard presets, each of which contains all of the settings for audio processing.
Info
Items controlled by the remote control (volume, mute, input source) are not stored in the presets.
Selecting a preset
Click on the desired preset number. Or if you have renamed the presets, its name.
Renaming
To rename a preset, select it, then click the RENAME button. Enter the desired name, then click OK. The name can be up to 12 letters long.

Importing and exporting
To import a preset from a file, click the IMPORT button, then navigate to a saved preset file and click Open. The preset will be loaded from the file. If Device Console is currently connected to the miniDSP 2x4 HD, the preset will also be sent to the 2x4 HD.
To export a preset to a file, click the EXPORT button. Navigate to the desired location in the file system, change the file name if desired, and click Save.
Info
It is not possible to load a preset from the 2x4 HD back to the Device Console. We strongly recommend always exporting your presets to files when they are complete, to ensure that you don't lose them in future.
Tip
To copy all settings from one preset to another, export the first preset to a file, select the second present, and then import the file that you just saved.
Resetting
To reset the current preset to default values, click the RESET button.
To reset all four presets to default values, click the RESET-ALL button.
Firmware updates
miniDSP Device Console will check for firmware updates when a device is connected, and notify you if one is available. To manually update the firmware, click the Refresh DSP Firmware and Refresh XMOS Firmware button.

Tip
You do not need to use these buttons in normal operation. They are there in case your 2x4 HD has issues or miniDSP Support instructs you to refresh the firmware.
Convert to DDRC-24
Dirac Live is an optional upgrade to the miniDSP 2x4 HD. You can purchase and activate the upgrade from within the miniDSP Device Console. After the upgrade is done, switch to using the DDRC-24 User Manual.
Warning
All configuration presets will be erased. Ensure that you have saved all of your configurations to named files if you wish to preserve any of the data. Once your device has been converted to a DDRC-24, you will not be able to load the 2x4 HD configuration files into it. Any filters or crossovers that you wish to transfer over must be reloaded from scratch as a new configuration in the DDRC-24. Note that FIR filters can not be transferred, as the DDRC-24 does not provide them in a user-accessible way.
Note also that, since the DDRC-24 does not run at the same internal sample rate as the 2x4 HD, all biquad filters – including those generated by REW Auto EQ – will need to be regenerated at 48 kHz.
To begin, click on Convert to DDRC-24 in the Device Console sidebar:

Read the information and warning notices and click through if you wish to proceed.
The upgrade is a two-step process: 1. purchase; 2. activate.

1. Purchase the Dirac Live upgrade
Tip
Before proceeding, check the system requirements for the DDRC-24, as they are higher than for the standard version.
Click on BUY UPGRADE. A browser window will open on stripe.com. Enter your payment details and click Pay. You will be redirected to an acknowledgement screen, and also receive a receipt by email.
Info
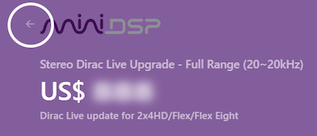
After you press the Buy Upgrade button, miniDSP Device Console will wait for an acknowledgement from the payment system. If you decide not to proceed with the upgrade, click the back-arrow button near the top left of the purchase screen. Here is an example:
If you just close the payment window, Device Console will wait 30 minutes for the acknowledgement; in that case, quit and restart the Device Console application.
2. Activate the Dirac Live upgrade
After payment completes, return to the miniDSP Device Console window. You will see acknowledgement of successful payment:

Click OK to return to the upgrade screen:

Click on RETRIEVE KEY ONLINE to retrieve the activation key. Then click ACTIVATE to activate the upgrade on your 2x4 HD.
Tip
Retrieving the activation key online requires an active Internet connection. If you have a device that needs to be activated while offline, save the activation key file that was attached to the purchase acknowledgement email onto a USB stick. On the device to be activated, click LOAD FROM FILE and select the file from the USB stick.
After activating, the 2x4 HD will restart. When it comes back online, it will appear in the Device Console list of devices as a DDRC-24.
The miniDSP 2x4 HD presets will not be converted to the DDRC-24. When reconnecting, you can choose to either restore all presets to their default values or to use existing DDRC-24 presets.

Tip
Be sure to use the DDRC-24 version of the manual/help after you have completed the upgrade.